
DIY Deck Privacy Screen: A Complete How-To Tutorial
Imagine enjoying your morning coffee or a quiet evening outside without feeling like you’re on display. Sounds great, right? If your deck feels more like a stage than a sanctuary, it might be time to think about a deck privacy screen. The good news? You don’t have to hire a contractor or break the bank. This DIY tutorial will walk you through the steps to create a simple, stylish, and functional privacy screen for your deck—all by yourself.
Why Build a Deck Privacy Screen?
Your deck is supposed to be a place for peace, not peeping neighbors. A privacy screen adds a layer of comfort and a little style too. Whether you want to block views, create shade, or add a decorative feature to your space, a deck privacy screen does the trick.
Here are a few reasons people love adding one:
- It blocks prying eyes.
- It reduces wind and sun exposure.
- It adds an aesthetic element to the outdoor area.
- It’s great for hanging plants, lights, or even outdoor art.
Step-by-Step Guide to Building Your Own Deck Privacy Screen
Let’s get into the heart of it. Here’s how you can build your own deck privacy screen with just a few tools, a free weekend, and some good old-fashioned elbow grease.
Step 1: Plan Your Design
First, decide on the style of your privacy screen. Do you want horizontal slats? Vertical panels? Lattice work? Your choice should match your deck’s style and your personal preference.
Questions to consider:
- How tall should the screen be?
- How much space do you want between slats or panels?
- Do you want to stain or paint the wood?
Grab a notebook and sketch a simple layout. Nothing too fancy—just enough to guide your project.
Step 2: Gather Your Materials
Here’s a list of what you’ll typically need:
Materials:
- Wooden posts (4×4 or 2×4, depending on your design)
- Boards for slats (1×6 or 1×4)
- Wood screws or deck screws
- Wood stain or paint (optional)
- Concrete (if you’re setting posts into the ground)
- Brackets or L-plates (if attaching to the deck)
Tools:
- Drill
- Saw
- Level
- Measuring tape
- Sandpaper or electric sander
- Safety gear (gloves, goggles, etc.)
Step 3: Measure and Mark the Area
Using a tape measure, mark where you’ll be placing the screen. Most people add it to the edge of the deck or one side for partial coverage. Make sure it doesn’t interfere with any railing or block an exit.
Step 4: Install the Support Posts
Depending on your deck, you can either:
- Attach the posts directly to the deck frame using brackets, or
- Dig holes next to the deck and set the posts into concrete for added stability.
Make sure the posts are straight using a level before securing them. This is key—crooked posts make everything else difficult.
Let the concrete cure (if you used it) and double-check that everything is solid before moving on.
Step 5: Attach the Slats or Panels
Now it’s time to build out the screen. Here’s where your design choices come into play. For a clean look, many people prefer horizontal slats spaced evenly.
Start from the bottom and work your way up:
- Use a spacer (like a scrap piece of wood) to keep gaps consistent.
- Drill pilot holes first to prevent the wood from splitting.
- Screw the boards into place, checking for level each time.
You can also mix materials—like adding lattice at the top for airflow or using metal brackets for a modern touch.
Step 6: Sand and Finish
Once the boards are in place, sand everything smooth. You don’t want any rough spots or splinters.
Then choose your finish:
- Stain enhances the wood grain and offers a natural look.
- Paint adds color and can match your home or deck décor.
- A weatherproof sealant is always a good idea to protect from rain and sun.
Let it dry according to the product instructions before hanging anything on it or placing furniture nearby.
Step 7: Add Personal Touches
Now for the fun part—decorating! You can hang string lights, mount small planters, or even add a piece of outdoor art. The screen not only adds privacy but also acts as a design feature.
Real-Life Example: Mike’s Backyard Makeover
Mike, a homeowner in Ontario, wanted a way to block the view of his neighbor’s kitchen window. He didn’t want to build an entire fence but needed something that would give him a bit of peace while enjoying his deck.
Using a few 4×4 posts and cedar planks, he built a horizontal slat screen along one edge of his deck. He stained the wood a rich walnut color and added hanging planters with herbs and flowers. Now, not only does Mike enjoy more privacy, but his deck has become a cozy retreat—and a conversation starter whenever friends visit.
Maintenance Tips for Long-Lasting Results
Your deck privacy screen will face the elements all year round, so a little maintenance goes a long way.
- Reapply sealant or paint every 1-2 years.
- Check screws and fittings yearly to tighten anything that’s come loose.
- Keep an eye out for mold or mildew in shady spots and clean as needed.
- If any boards warp or crack, replace them to keep the screen looking fresh.
Alternative Ideas If You’re Short on Time
Not feeling up to building from scratch? Here are a few easier (but still effective) options:
- Use outdoor curtains with a tension rod.
- Set up tall planter boxes with trellises and climbing plants.
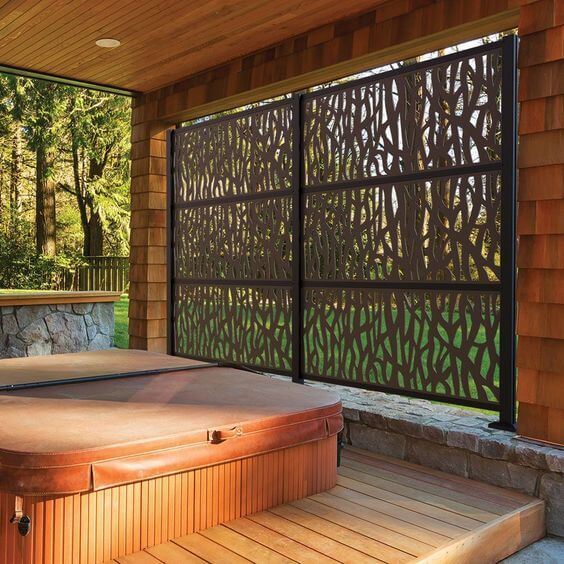
- Buy pre-made panels from a home improvement store and install them as needed.
These won’t give the same customized look, but they’re great for quick fixes or rental spaces.
FAQs
Can I use this screen on a balcony or patio?
Absolutely. Just adjust the height and width to fit your space. Make sure it’s secure, especially in windy areas.
How much does it cost to build a privacy screen?
It depends on materials and size. A simple wood slat screen can cost between $100 to $300, depending on your choices.
What wood should I use?
Cedar and redwood are popular for outdoor use due to their resistance to decay. Pine is cheaper but needs sealing.
How long does it take to build?
If you have all materials ready, you can build a simple screen in a day or two.
Final Thoughts
A deck privacy screen is more than just a weekend project—it’s a way to turn your outdoor area into a peaceful, personal haven. Whether you’re blocking out the neighbor’s view or just adding a design feature, this DIY solution is worth the effort.
So grab your tools, get a little sawdust on your clothes, and transform your deck into a space that feels truly yours.
And who knows? Your neighbors might get inspired too—and that’s okay, as long as they don’t peek through the slats!