
Multimeter Tips: How to Safely Test a Servo Motor at Home
Servo motors play a vital role in many devices we use every day—from robotics and remote-controlled toys to CNC machines and automation systems. If you’re working on a DIY project or maintaining your home workshop, knowing how to test a servo motor with a multimeter can save time, money, and unnecessary frustration.
In this guide, we’ll walk you through how to safely test a servo motor at home using a multimeter. Whether you’re a beginner or have some hands-on experience, these tips will help you keep your motor running smoothly.
What Is a Servo Motor?
Before diving into the testing steps, let’s clarify what a servo motor is.
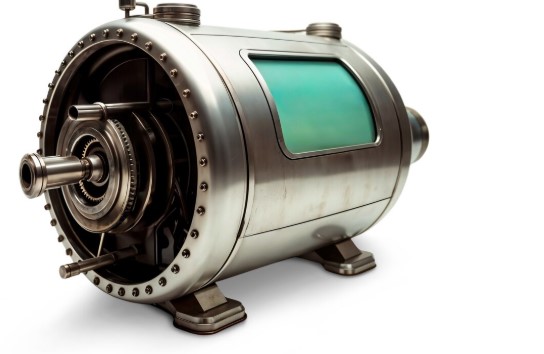
A servo motor is a rotary actuator that allows for precise control of angular position, speed, and acceleration. It typically consists of a motor, a feedback sensor (usually a potentiometer or encoder), and a control circuit. These motors are commonly found in automation, robotics, and model-making projects.
Servo motors come in two main types:
- AC Servo Motors – Used in industrial machinery due to their higher efficiency.
- DC Servo Motors – Commonly used in hobby electronics and small-scale applications.
Regardless of the type, knowing how to test them with a multimeter is a valuable skill for troubleshooting.
Why Use a Multimeter to Test a Servo Motor?
A multimeter is an essential tool in every technician or hobbyist’s toolbox. It allows you to measure voltage, resistance, and continuity—three crucial aspects when diagnosing issues with electrical components.
Testing a servo motor with a multimeter helps you:
- Detect internal faults or short circuits
- Check resistance levels of motor windings
- Confirm power input
- Identify wiring issues
Now let’s walk you through the safe way to perform this test.
Safety First: Precautions Before Testing
Before you begin testing a servo motor at home, make sure you follow these basic safety precautions:
Unplug all power sources: Never test a powered motor unless specifically instructed. Disconnect the power supply to avoid electric shock or damage.
Work in a dry environment: Water and electronics don’t mix. Make sure your workspace is dry and clean.
Handle with care: Servo motors contain delicate components. Avoid dropping or shaking them.
Use proper tools: Always use a good-quality digital multimeter, preferably one with auto-ranging capability for easier measurements.
Tools You Will Need
Here’s a quick list of what you’ll need for the process:
- A digital multimeter (with voltage, resistance, and continuity settings)
- The servo motor you want to test
- The servo’s datasheet or specifications (if available)
- Insulated gloves (optional but recommended)
Step-by-Step Guide to Testing a Servo Motor with a Multimeter
1. Visual Inspection
Before using your multimeter, start with a basic check:
- Look for burnt marks or a smell of burnt plastic.
- Inspect the wiring for any cuts, breaks, or loose connections.
- Ensure the shaft of the motor rotates freely by hand.
2. Identify the Motor Wires
Most small servo motors have three wires:
- Power (usually red)
- Ground (usually black or brown)
- Signal (usually yellow, white, or orange)
Larger industrial servo motors may have multiple wires for feedback, encoder signals, or additional phases. Consult the datasheet if you’re unsure.
3. Check Power Supply Input
Set your multimeter to the DC voltage mode. If your servo is connected to a circuit, check the voltage between the power and ground wires.
Expected reading: Between 4.8V and 6V for small DC servo motors.
(Industrial servos may operate at higher voltages, like 24V or even 48V.)
If the voltage is outside the recommended range, the motor might not function properly.
4. Measure Coil Resistance
Switch your multimeter to Ohms (Ω) mode.
Now test the resistance between:
- Power and Ground wires
- Signal and Ground wires
The resistance should not be zero (which means a short circuit) or infinite (which indicates an open circuit). For most hobby servos, you’ll get a reading between 10 and 100 Ohms.
🔍 Tip: Compare the readings with the specifications in the motor datasheet.
5. Check Continuity
Set your multimeter to the continuity mode (usually represented by a soundwave icon).
Place the probes between the motor’s terminals:
- Power to Ground
- Signal to Ground
- Power to Signal
If you hear a continuous beep between any two terminals (where it shouldn’t exist), you might be dealing with a short circuit inside the motor.
6. Inspect the Feedback Circuit
Some servo motors contain an internal potentiometer or encoder for feedback. You can test this by rotating the shaft slowly and checking the resistance change between the signal and ground terminals.
- Connect the multimeter in Ohms mode to the signal and ground wires.
- Rotate the shaft.
- The resistance should increase or decrease smoothly.
If the reading jumps or stays the same, the potentiometer might be faulty.
Common Servo Motor Issues You Might Detect
Here are a few common issues you may uncover while testing with a multimeter:
- No voltage across power terminals: Power supply issue.
- Very high or very low resistance: Damaged windings.
- No change in feedback resistance: Faulty potentiometer.
- Beeping continuity between power and ground: Short circuit.
Identifying these problems early can save you from replacing a working motor or damaging your control board.
When to Replace a Servo Motor
If you detect any of the following after testing:
- Burnt smell or visible damage
- Short circuit between power and ground
- Erratic resistance readings on the feedback loop
- No shaft movement even with correct power
it’s probably time to replace the motor.
Final Thoughts
Testing a servo motor at home doesn’t require expensive tools or advanced knowledge—just a good digital multimeter and some patience. By following the above steps, you can safely and effectively diagnose issues and ensure your servo motor is ready for action.
Remember: Safety comes first. Always disconnect power and handle electrical components carefully. If you’re unsure about any step, don’t hesitate to consult a professional or refer to the manufacturer’s documentation.
Whether you’re a hobbyist, technician, or curious DIYer, mastering the skill of testing servo motors will make you more confident in your electronic projects.